PDQ Deploy target lists are viewed on their specific target list page in the Main Console window and they are modified in the Targets Editor. Target lists can also be duplicated, exported and imported, organized on the Main Console tree, and used to launch a deployment.
This section describes how to manage target lists and includes the following topics:
•Exporting and Importing Target Lists
Using Target Lists
The following table describes how target lists can be used in deployments:
Task |
Details |
Add Target Computers to Deploy Once |
In the Deploy Once window, click Choose Targets > Target List. For more details, see Deploying Package(s) with Deploy Once. |
Drag and Drop |
To Initiate a Deploy Once deployment, do one of the following: •Drag and drop one or more Packages onto a target list. •Drag and drop a target list onto a Package. |
Add Target Computers to Scheduled Deployments |
In the Schedule window, do one of the following: •To add target computers using external sources, click Choose Targets > Target List. •To add targets by linking to external sources, click Link To > Target List. For more details, see Creating Scheduled Deployments. |
Add a Target List's computers to another Target List |
In the Target List window, click Choose Targets > Target List. This will add all of the target computers as static targets from the selected Target List into the new Target List. |
Link a Target List to another Target List |
In the Target List window, click Link To > Target List. This will add the selected Target List dynamically into the new Target List and will reflect as one target. |
Organizing Target Lists
Target lists can be organized by:
•Renaming
To rename a target list, select it, click Edit > Rename (or right-click and select Rename or press F2), edit the name, then click OK.
•Moving
Select and drag target lists to change their order in a list or move them from folder to folder. For details about organizing target lists with custom folders, see Custom Folders.
NOTE: While using Central Server, moving a target list into the Private Packages folder ![]() will automatically duplicate it. You can then choose to delete the original target list, if desired. Additionally, moving a target list outside the Private Package folder will make it public.
will automatically duplicate it. You can then choose to delete the original target list, if desired. Additionally, moving a target list outside the Private Package folder will make it public.
•Customizing
For information about setting custom appearance options, see Item Appearance Window.
Duplicating Target Lists
You can streamline the creation of new target lists by duplicating, renaming, and editing a target list that is similar to the new target list you need.
To duplicate a target list:
1.Select the target list you want to duplicate.
2.Click File > Duplicate (or right-click and select Duplicate or press Alt+Insert).
A duplicate target list appears in the tree with a number appended to its name.
3.(Optional) To rename a target list, click Edit > Rename (or right-click and select Rename or press F2), edit the name, then click OK.
It’s good practice to rename the target list so it matches its new purpose and to avoid confusion when using the original target list.
4.To edit the selected target list, double-click it or click Edit Target List on its Target List page.
For information about modifying target lists, see Editing Target Lists below.
Exporting and Importing Target Lists
Target lists can be exported to an XML file and then imported into PDQ Deploy on another computer.
To export target lists:
1.Select one or more target lists or a folder of target lists.
When exporting a folder, all of the target lists and folders within it are also exported.
2.Click File > Export (or right-click and select Export or press Ctrl+E).
3.Browse to where you want to save the target list, then click Save.
To import target lists:
1.To determine where the imported target list or target lists are placed in the Main Console Tree, do one of the following:
•To import at the top level of the tree, click the empty part of the tree.
•To import into a folder, select the folder or an item in the folder.
2.Click File > Import (or right-click and select Import or press Ctrl+I).
3.Browse to and select the target lists definition, then click Open.
Editing Target Lists
Target lists are created and edited in the Targets Editor. The Targets Editor can be accessed from the individual Target List page on the Main Console window, the Deployment window, or the Schedule window.
To edit a target list:
1.To open a target list, do one of the following:
•On the Main Console tree, browse to and select a target list, then double-click it or on the target list page, click Edit Target List.
•On the Deploy Once window, click Choose Targets > Target List, then select a target list and click Edit.
•On the Schedule window, click the Targets tab, click Choose Targets > Target List, then select a target list and click Edit.
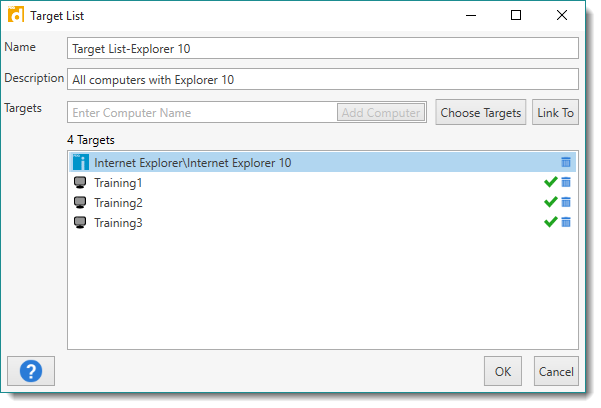
2.(Optional) Edit the target list name.
3.To modify the target list, see the following table for a list of tasks and details:
Task |
Details |
Manually Add Target Computers |
Type a computer name in the Targets field, then click Add Computer. When you add a target computer, the name appears in the list and the system (DNS) checks to be sure it exists on the network. NOTE: You can also paste a target computer name (or list of names) directly into the Target area of the window. If copying a list of names, ensure that there is only one target computer name per line. |
Choose Targets |
To add target computers using external sources with Choose Targets, click Choose Targets (or right-click the Target area and click Choose Targets), then select a source. For detailed information, see Creating a Target List, Part 2: Choose Targets. |
Link To (Linked) |
To add targets by linking to external sources with Link To, click Link To (or right-click the Target area and click Link To), then select a source. For detailed information, see Creating a Target List, Part 3: Link To (Linked Target List Elements). |
Delete a Target |
To remove a target from the list, click Delete this target |
4.When you finish editing, click OK to save changes and close the target list.
© 2018 PDQ.com Corporation. All rights reserved.
PDQ.com is a trademark of PDQ.com Corporation. All other product and company names are the property of their respective owners.
Help Version: 16.1.0.0