PDQ Deploy reports and report profiles can be previewed in the Print Preview window (depending on what is selected in the interface). There are only two reports types with customizable profiles: Deployment Details and Schedule Details. Report profiles control the information that is included in the report. Report profiles can be modified, created, and deleted from the Print Preview window.
This topic describes how to manage report profiles and includes the following sections:
•Creating a Deployment Report Profile
•Creating a Schedule Report Profile
Creating a Deployment Report Profile
To create a new Deployment report profile you must select a deployment somewhere in PDQ Deploy (for example, on the Deployments page or on the Deployments tab on a Package page), then click Reports > Deployments Details > Profile.
To create a new Deployment Report Profile:
1.In the Print Preview window click Add.
The Deployment Report Profile window opens.
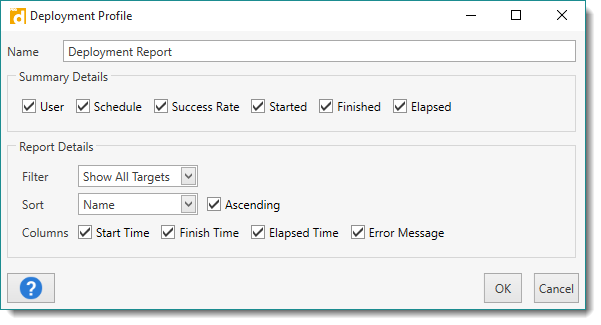
2.Provide a name for the profile.
3.Under Summary Details, select the checkboxes of the data you want to include in the report.
4.Under Report Details, choose a Filter:
•Show All shows all deployment results.
•Show Failed shows only failed deployments.
•Show Successful shows only successful deployments.
5.Choose the column on which to sort the results.
6.(Conditional) Select Ascending if you want to sort the selected column in ascending order.
7.Select the checkboxes of the Columns you want to include in the report.
8.Click OK when you are done.
The new Deployment Report Profile is saved under Report Type: Deployment.
9.(Optional) To edit a report profile, select the profile in the Print Preview window, then click Edit.
10.(Optional) To delete a report profile, select the profile in the Print Preview window, click Delete, then click OK to accept the deletion.
Creating a Schedule Report Profile
To create a new Schedule report profile you must select a schedule somewhere in PDQ Deploy (for example, on the All Schedules page or on the Schedules tab on a Package page), then click Reports > Schedule Details > Profile.
To create a new Schedule Report Profile:
1.In the Print Preview window click Add.
The Schedule Report Profile window opens.
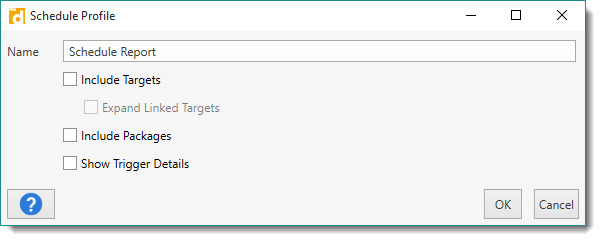
2.Provide a name for the profile.
3.Choose what you want to include in the report:
Option |
Description |
|
Include Targets |
Includes all target computers associated with the schedule. |
|
|
Expand Linked Targets |
Includes all target computers that are part of a linked target (AD Containers, PDQ Inventory Collections, Spiceworks Groups, and/or Target Lists). |
Include Packages |
Includes packages associated with the schedule and their location. |
|
Show Trigger Details |
Includes schedule summary, description, and whether or not the trigger is enabled. |
|
4.Click OK when you are done.
The new Schedule Report Profile is saved under Report Type: Schedule.
5.(Optional) To edit a report profile, select the profile in the Print Preview window, then click Edit.
6.(Optional) To delete a report profile, select the profile in the Print Preview window, click Delete, then click OK to accept the deletion.
Editing a Report Profile
To edit a report profile, you must select an element in PDQ Deploy that matches the report and profile type you wish to edit, then click Reports > Report > Profile.
To edit a Report Profile:
1.In the Print Preview window, select a profile, then click Edit.
2.(Conditional) Edit the profile details, depending on the type of report:
•For Deployment Details reports, see Creating a Deployment Report Profile above.
•For Schedule Details reports, see Creating a Schedule Report Profile above.
3.Click OK when you are done.
© 2018 PDQ.com Corporation. All rights reserved.
PDQ.com is a trademark of PDQ.com Corporation. All other product and company names are the property of their respective owners.
Help Version: 16.1.0.0