Target lists are created in the Targets Editor. Target lists are optional, but they can make using the system more efficient so you don’t need to define the same targets every time you create or schedule a deployment.
The Targets Editor can be accessed from the specific Target List page on the Main Console window, the Deploy Once window, or the Schedule window.
This procedure includes the following parts:
•Part 3: Link To (Linked Target List Elements)
Part 1: New Target List
To create a target list:
1.Do one of the following:
•On the Main Console, click New Target List (or File > New Target List or press Ctrl+Shift+T).
•On the Schedule window, click the Targets tab, then click Choose Targets > Target List, then click New.
NOTE: To create a new private target list while using Central Server, select the Private Packages folder ![]() prior to creation. If the target list is created outside the Private Packages folder, it is available for public use. You can simply drag the new target list into the Private Packages folder to make it private and then delete the original.
prior to creation. If the target list is created outside the Private Packages folder, it is available for public use. You can simply drag the new target list into the Private Packages folder to make it private and then delete the original.
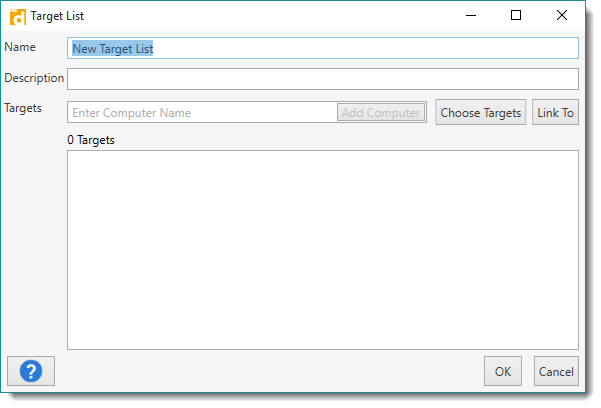
2.Type a name for the target list.
It’s important to name target lists logically and consistently. Use names that make sense for the group of targets you select.
3.(Optional) Type a description for the target list.
4.(Optional) To manually add a target computer to the list, type the computer name in the Targets field, then click Add Computer. Alternately, you can also paste a target computer name (or list of names) directly into the Target area of the window. If copying a list of names, ensure that there is only one target computer name per line.
When you add a target computer manually, the name appears in the list and the system (DNS) checks to be sure it exists on the network. Targets resolved by DNS appear with a green checkmark ![]() .
.
NOTE: If the computer name can’t be found, a warning icon ![]() displays next to the Delete this target
displays next to the Delete this target ![]() button. Check the name you typed and try it again. If you can’t add a computer manually, see Part 2: Choose Targets or Part 3: Link To (Linked Target List Elements) for alternative methods of finding and adding target computers to the list. Delete unresolved computer names from the list.
button. Check the name you typed and try it again. If you can’t add a computer manually, see Part 2: Choose Targets or Part 3: Link To (Linked Target List Elements) for alternative methods of finding and adding target computers to the list. Delete unresolved computer names from the list.
5.(Conditional) Do one of the following:
•To add specific target computers to the target list using external sources with Choose Targets, see Part 2: Choose Targets.
•To add linked lists of target computers to the target list with Link To, see Part 3: Link To (Linked Target List Elements).
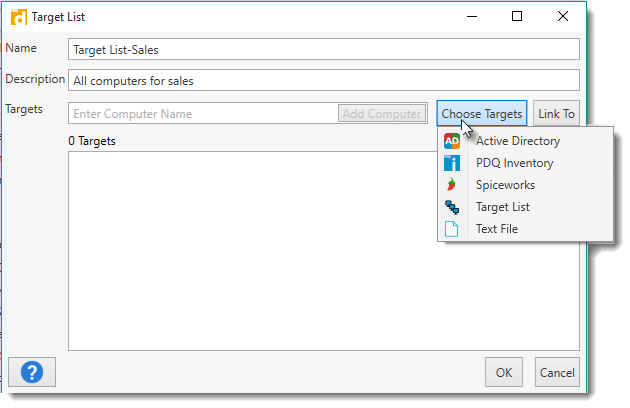
Part 2: Choose Targets
Use Choose Targets to add specific target computers to the target list by selecting computer names from external sources such as Active Directory (AD), PDQ Inventory, and Spiceworks. When you build a target list with Choose Targets, you select specific computers, no matter how you browse for them. For example, if you use Choose Targets to select target computers from an Active Directory OU called Accounting, you select specific computers under the Accounting OU.
To add linked lists of target computers to the target list with Link To, see Part 3: Link To (Linked Target List Elements).
To add target computers to the target list with Choose Targets:
1.Click Choose Targets (or right-click in the Targets area and click Choose Targets), then select an option:
Source |
Description |
Active Directory |
Select target computers from Active Directory containers or groups. (See step 2.) |
PDQ Inventory |
Select target computers from PDQ Inventory Collections. (See step 3.) |
Spiceworks |
Select target computers from Spiceworks Groups. (See step 4.) |
Target List |
Select target computers using other PDQ Deploy Target Lists. (See step 5.) |
Text File |
Select a text file containing a list of target computer names. (See step 6.) |
2.(Optional) Click Choose Targets > Active Directory.

a.Browse AD containers to locate target computers.
To switch to a different domain, click Change Domain.
b.Select one or more computers (Shift+click or Ctrl+click), then click Add Selected Computers ![]() to add them to the target list.
to add them to the target list.
c.(Optional) To add all computers in the Computers list, click Add All Computers ![]() .
.
d.Click OK to add your selections to the target list.
3.(Optional) Click Choose Targets > PDQ Inventory.
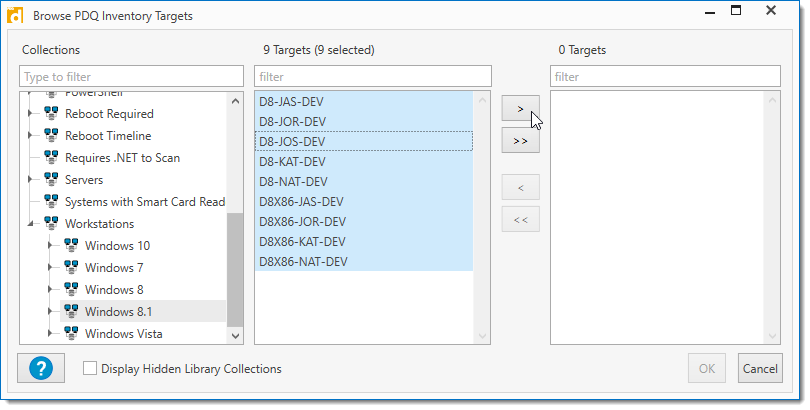
a.Browse PDQ Inventory collections to locate target computers.
PDQ Inventory can create default or custom collections of computers by attributes such as installed applications, OS version, or hardware configurations. For more information about PDQ Inventory, see our website at https://www.pdq.com/pdq-inventory.
b.Select one or more computers (Shift-click or Ctrl-click), then click Add Selected Computers ![]() to add them to the target list.
to add them to the target list.
c.(Optional) To add all computers in the Computers list, click Add All Computers ![]() .
.
d.Click OK to add your selections to the target list.
4.(Optional) Click Choose Targets > Spiceworks.

a.Browse Spiceworks groups to locate target computers.
If you have not configured PDQ Deploy to work with your Spiceworks data, the PDQ Deploy Preferences window will open on Spiceworks settings. For details about configuring Spiceworks preferences, see Spiceworks Preferences.
b.Select one or more computers (Shift-click or Ctrl-click), then click Add Selected Computers ![]() to add them to the target list.
to add them to the target list.
c.(Optional) To add all computers in the Computers list, click Add All Computers ![]() .
.
d.Click OK to add your selections to the target list.
NOTE: It may take a minute or two to sync with Spiceworks and create the collection.
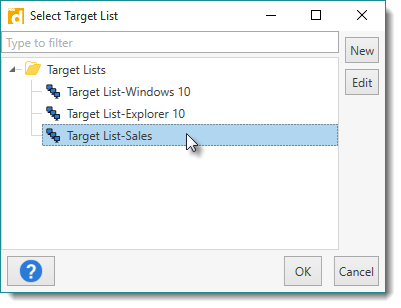
5.(Optional) Click Choose Targets > Target Lists, then select a target list and click OK.
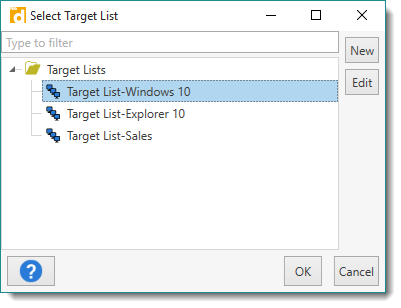
The target computers from the selected list are added individually.
6.(Optional) Click Choose Targets > Text File, browse to and select a text file, then click Open.
The target computer names listed in the file are added individually.
NOTE: You can import the target list XML files (.xml) that PDQ Deploy exports (see Exporting and Importing Target Lists) or text (.txt) and CSV files (.csv). Text files and CSV files must have one target computer name per line.
7.(Optional) To remove a target computer from the list, click Delete this target ![]() or select it, then press Delete.
or select it, then press Delete.
8.(Conditional) Do one of the following:
•If you are done, click OK to save the new target list.
•To add linked lists of target computers to your target list with Link To, see Part 3: Link To (Linked Target List Elements).
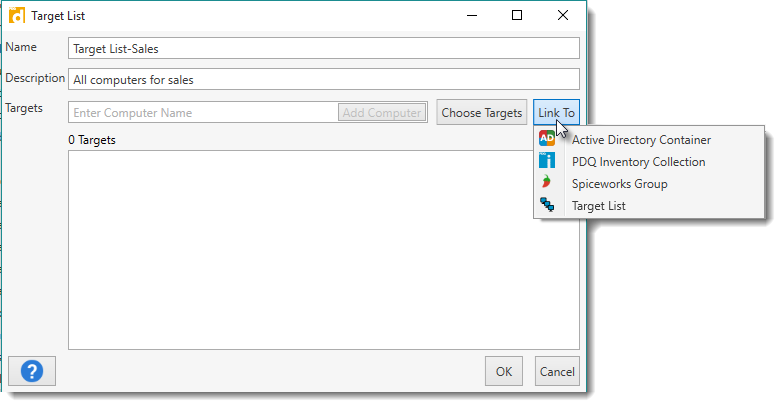
Part 3: Link To (Linked Target List Elements)
Use Link To to add linked lists of target computers to your target lists. For example, when you use Link To to add target computers with Active Directory, you select the Accounting OU as the target, not individual computers. Each time the schedule or an auto deployment kicks off, the computers in the Accounting OU are dynamically added as target computers at the time of the deployment.
NOTE: Link To may only be used when defining targets in a PDQ Deploy schedule. It cannot be used when using Deploy Once.
To add computers to the target list with Link To:
1.Click Link To (or right-click in the Targets area and click Link To), then select an option:
Source |
Description |
Active Directory Container |
Select Active Directory containers or groups. (See step 2.) |
PDQ Inventory Collection |
Select PDQ Inventory Collections. (See step 3.) |
Spiceworks Group |
Select Spiceworks Groups. (See step 4.) |
Target List |
Select other PDQ Deploy Target Lists. (See step 5.) |
2.(Optional) Click Link To > Active Directory Container.
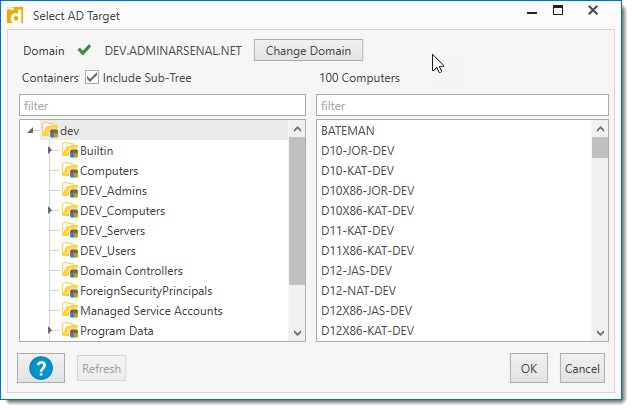
a.Browse AD containers and groups.
To switch to a different domain, click Change Domain.
b.Select a container or group, then click OK to add it to the target list.
3.(Optional) Click Link To > PDQ Inventory Collection.
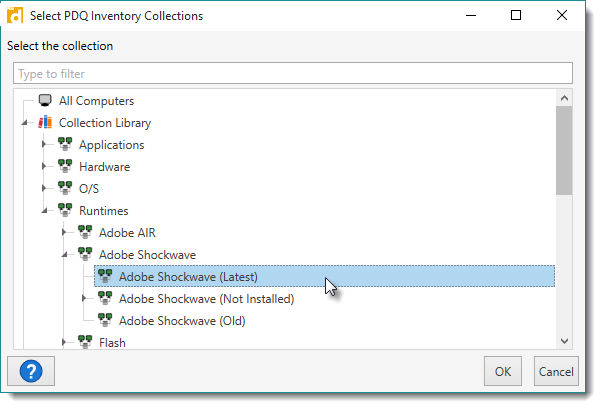
a.Browse PDQ Inventory collections.
PDQ Inventory can create default or custom collections of computers by attributes such as, installed applications, OS version, or hardware configurations.
b.Select a collection, then click OK to add it to the target list.
4.(Optional) Click Link To > Spiceworks Groups.
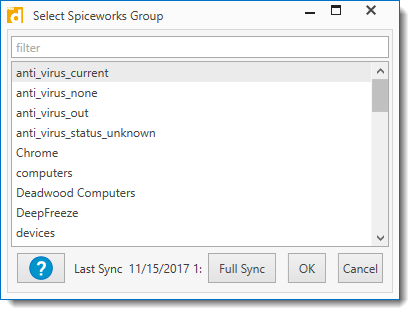
a.Browse Spiceworks groups.
If you have not configured PDQ Deploy to work with your Spiceworks data, the PDQ Deploy Preferences window will open on the Spiceworks page. For details about configuring Spiceworks preferences, see Spiceworks Preferences.
b.Select a Spiceworks group, then click OK to add it to the target list.
5.(Optional) Click Link To > Target List, select a target list, then click OK.
The target list is added to your new target list.
6.(Optional) To remove a target from the list, click Delete this target ![]() or select it, then press Delete.
or select it, then press Delete.
7.(Conditional) Do one of the following:
•If you are done, click OK to save the new target list.
•To add a specific target computers to your target list with Choose Targets, see Part 2: Choose Targets.
•To add linked lists of target computers to your target list with Link To, see Part 3: Link To (Linked Target List Elements).
© 2018 PDQ.com Corporation. All rights reserved.
PDQ.com is a trademark of PDQ.com Corporation. All other product and company names are the property of their respective owners.
Help Version: 17.1.0.0