PDQ Deploy allows you to define deployment parameters on a global, manual (Deploy Once), schedule, package, or step level. Deployment settings defined within a package apply to all deployments of that package and they override the global deployment settings defined in Preferences as well as any deployment settings defined at the Schedule level.
To define deployment settings for a package:
1.In the tree, select the package you want to manage.
2.Click Edit Package or double-click the package name.
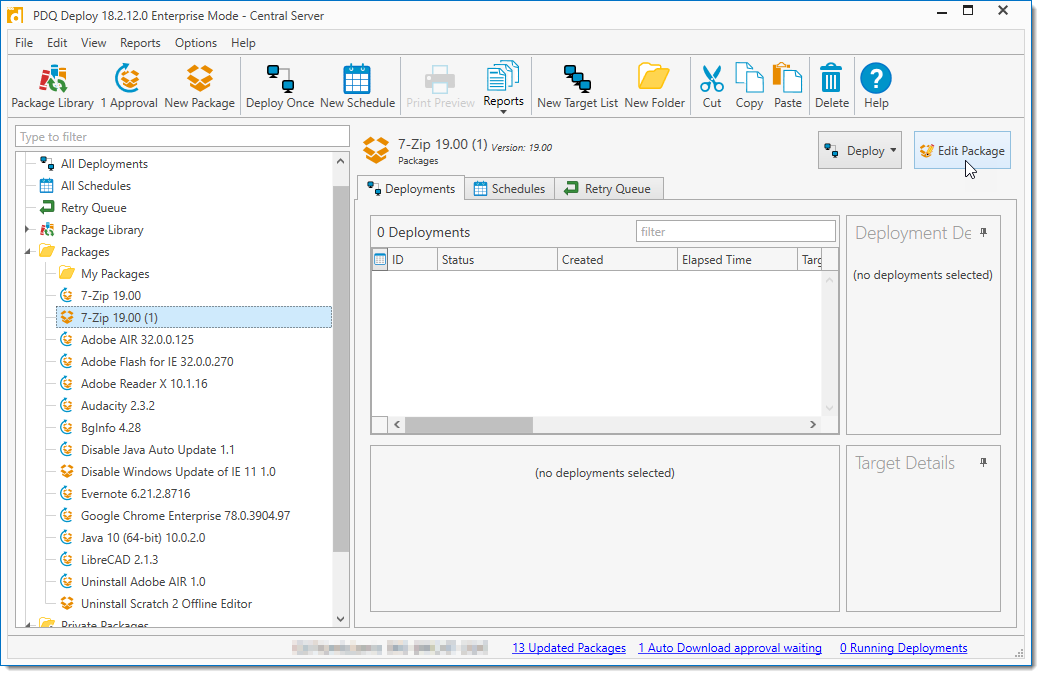
3.Select Package Properties in the Step list.
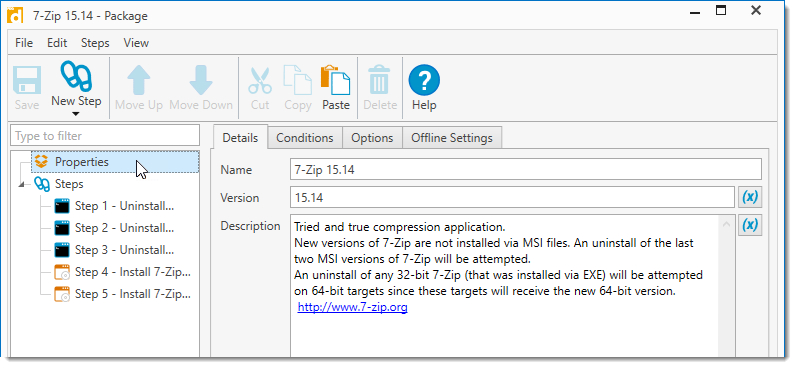
A Standard package will look at follows:
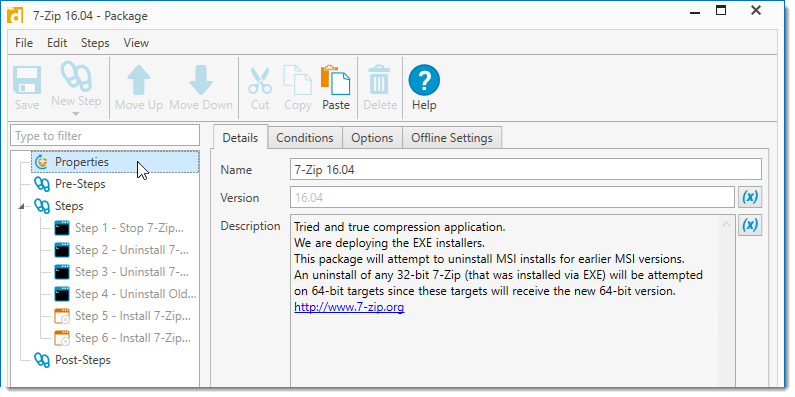
An Auto Download package will look as follows (Enterprise mode required):
4.Click the Details tab and define the settings you want to apply to the current package, when finished, click on the Conditions, Options, or Offline Settings tabs.
The following table provides information on the Deployment settings available in the Details tab:
Option |
Description |
Name |
A unique logical name. Use a package name that includes the product, version, and other important information such as architecture (for example, 32 or 64-bit). For additional naming guidance, look at how packages in the Package Library are named. IMPORTANT: For an Auto Download package, in order for the package to display the most up-to-date version number in the tree of the main console, do not change or delete the version number in the Name field. For example, the package 'Adobe Reader DC 17.012.20098', can be changed to 'CEO Reader 17.012.20098'. In order to have the version number display properly in the tree properly, leave a space between the new name and the version number. |
Version |
The installer version number. This field is primarily used for packages in the Package Library but you are free to use it for custom packages. NOTE: Unavailable for an Auto Download package. |
Description |
Provide a description with additional, relevant details about the package. For additional guidance, look at package descriptions in the Package Library. NOTE: Unavailable for an Auto Download package. |
5.Click the Conditions tab to define the conditions that must exist for the current package to run. The conditions When finished, click on the Options or Offline Settings tabs.
The following table provides information on the Deployment settings available in the Conditions tab:
Condition |
Description |
|
O/S Version |
Select the version or versions of Windows for which the package will be applied. |
|
O/S Architecture |
Choose whether the package is to run on 32-bit, 64-bit, or both operating system architectures. |
|
PowerShell version |
Select the version or versions of PowerShell for which the package will be applied. (This condition will only appear on the Install and PowerShell steps) IMPORTANT: PowerShell version 1 is not supported in PDQ Deploy |
|
Logged On State |
Determines whether or not the package runs, based on whether or not a user is logged on to the target computer. |
|
|
Always Run |
Run the package regardless of logged on state. |
Only run if no user is logged on |
Only run the package if no users are logged on. |
|
Only run if a user is logged on (including Locked and Disconnected) |
Only run the package if a user is logged on, including locked and disconnected sessions. |
|
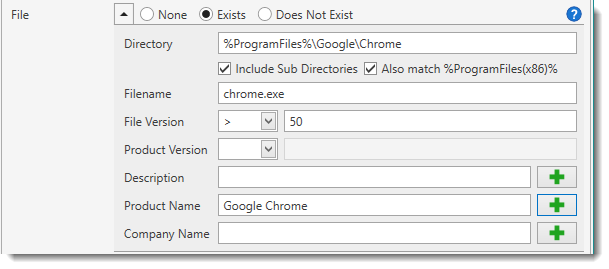
File |
Use this condition if you want to check for files on the target computer before running the package. For example, using the File Exists condition: Run only if Chrome.exe version is greater than 50 and product name equals Google Chrome.
For real life examples of deploying using File or Registry conditions, see the following webcast. VIDEO: PDQ Live! How to Selectively Deploy Applications Using File or Registry Conditions. |
|
|
None |
Select to disable the file condition (this is the default selection). |
Exists |
Select to search for an existing file before running the package. |
|
Does Not Exist |
Select to ensure there is no such existing file before running the package. |
|
Directory |
Enter the directory where the file exists on the target computer. This directory can include environment variables. NOTE: Environment variables will be evaluated in the context of the Local System rather than the user. For example, the %TEMP% environment variable will evaluate to %SystemRoot%\TEMP instead of %USERPROFILE%\AppData\Local\Temp. |
|
Includes Sub Directories |
Check to include all the sub directories of the directory above. |
|
Filename |
The name of the file. IMPORTANT: The first filename that is matched will be used. For example, you set a Does Not Exist File condition for C:\Temp\Fancyfile with a version of 1.5. There are two instances of Fancyfile. The File Condition locates the first file, Fancyfile version 1.25, thereby returning true (does not exist) even though the other Fancyfile version 1.5 does in fact exist. |
|
File Version |
The version of the file from its header, if present. This filter can be equal to, less than, greater than, less than or equal to, greater than or equal to. If left blank, this will disable the file version. |
|
Product Version |
The version of the product from its header, if present. This filter can be equal to, less than, greater than, less than or equal to, greater than or equal to. If left blank, this will disable the file version. |
|
Description |
The description of the product from its header, if present. Can use the standard * and ? wildcards. |
|
Product Name |
The product name of the product from its header, if present. |
|
Company Name |
The company name of the product from its header, if present. |
|
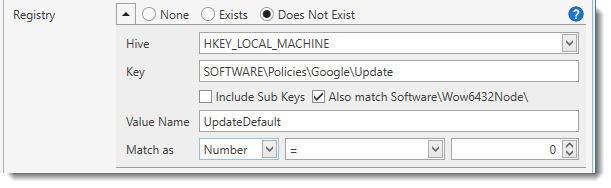
Registry |
Use this condition if you want to check registry key on the target computer before running the package. IMPORTANT: The registry option does not work for data that spans multiple lines. For example, using the Registry Does Not Exist condition: Run only if UpdateDefault value of 0 does not exist.
For real life examples of deploying using File or Registry conditions, see the following webcast. VIDEO: PDQ Live! How to Selectively Deploy Applications Using File or Registry Conditions. |
|
|
None |
Select to disable the registry condition (this is the default selection). |
Exists |
Select to search for an existing registry keys before running the package. |
|
Does Not Exist |
Select to ensure there is no such existing registry keys before running the package. |
|
Hive |
Choose between HKEY_LOCAL_MACHINE, HKEY_CLASSES_ROOT, and HKEY_USERS. |
|
Key |
Path of the key to look in. |
|
Include Sub Keys |
Looks also in all sub keys. |
|
Value Name |
Name of the value to match against. If the value name is left blank then the value of the key itself will be used. IMPORTANT: The first value name that is matched will be used. For example, using the Exists registry condition you search for printer IP addresses in HKLM\SYSTEM\CurrentControlSet\Control\Print\Printers with a 'port' value that contains the IP address of 192.168.0.100. Printer A is a software printer with a port in C:\ProgramData\PrintProgram\PortFile. Printer B has the port of 192.168.0.100. Because Printer A’s 'port' value is listed first, that is the value that is returned, hence the condition is false, even though Printer B’s port matches the condition. |
|
Match as |
The type of matching to use on the value. Choose between Text, Number, and Version. Choose the condition and enter the applicable value. IMPORTANT: The registry option does not work for data that spans multiple lines. |
|
PDQ Inventory Collection |
Use this condition if you want to make sure a target computer is or is not a member of a certain collection in PDQ Inventory before running the package. IMPORTANT: This requires both PDQ Inventory and PDQ Deploy in Enterprise mode. For the integration to work properly with Central Server, both products will need to be installed on the same console with both running in either Server mode or Client mode. |
|
|
None |
Select to disable the collection condition (this is the default selection). |
Is A Member |
Select to ensure the target computer is a member of the selected collection before running the package. IMPORTANT: Using this condition does not prompt PDQ Inventory to do a scan of the collection at the time of the deployment. The membership of the selected collection is only as good as the last scan. |
|
Is Not A Member |
Select to ensure the target computer is not a member of the selected collection before running the package. IMPORTANT: Using this condition does not prompt PDQ Inventory to do a scan of the collection at the time of the deployment. The membership of the selected collection is only as good as the last scan. |
|
Collection |
Click Select Collection to browse your PDQ Inventory collections and select the collection to use. Click OK once the collection is selected. |
|

6.Click the Options tab and define the settings you want to apply to the current package, when finished, click on the Offline Settings tab.
The following table provides information on the Deployment settings available in the Options tab:
Option |
Description |
|
Copy Mode |
Defines how PDQ Deploy copies deployment files to target computers (requires Enterprise mode). When files (such as installation files) are copied to a target, PDQ Deploy can use either Push or Pull Copy Mode. By default, PDQ Deploy uses Push Copy Mode. You can change the default Copy Mode in Preferences > Performance or override the default here. See Copy Mode in Performance Preferences for more information. VIDEO: PDQ Live! Understanding Push and Pull Deployments |
|
|
Push |
Copies files to the target computers from the PDQ Deploy computer. This method is best if the package’s install files are located on the PDQ Deploy computer. This option is the default copy mode. Bandwidth throttling applies to all simultaneous file copies combined. |
Pull |
Sends lists of files to the target computers which then pull the files from a centralized location. This method works best in WAN environments where the files may be on a file server closer to the target computers than the computer where PDQ Deploy is running. For this method to work, all files need to be accessible using a UNC path (e.g. \\server\share\installer.msi). WARNING: Files on fixed or mapped drives are not accessible to the target computers; therefore, a valid UNC path must be provided. Note Bandwidth throttling is not enforced when using Pull Copy Mode. IMPORTANT: This setting is available only in Enterprise mode. |
|
Select whether or not PDQ Inventory scans target computers after a deployment to identify what is installed on each computer. If you have a package that doesn't install an application, you may want to disable inventory scanning for the package. IMPORTANT: This feature is available only in Enterprise mode and also requires PDQ Inventory in Enterprise mode. If you are running in Client Mode, PDQ Inventory must be installed on the computer running in Server Mode. Additionally, the target computer must already be in PDQ Inventory with a name or hostname that matches the name used in PDQ Deploy. Set the Program Default in Preferences > Deployments or override the default here. |
||
|
Scan after Deployment |
Initiates an inventory scan from PDQ Inventory after a deployment to identify what is installed on each workstation. Scan after Deployment attempts to scan target computers even if deployments fail. This feature can be very helpful in maintaining up-to-date inventory for target machines. The target computers must already be in PDQ Inventory with names or hostnames that match the names used in PDQ Deploy. You may choose which Scan Profile to use. The default Scan Profile is defined in PDQ Inventory in Preferences > Scan Profiles. You can choose to scan with any Scan Profile that has been configured in PDQ Inventory. It is common to use either the Applications or Standard scan profiles. |
Do Not Scan |
Does not scan target computers after deployment. |
|
Run As |
During a deployment, a Windows service is created on the target computer. The Run As setting determines how this service "logs on" after it is created. The default (and generally appropriate) setting is Deploy User. Change the default in Preferences > Deployments or override the default here. For a sample demonstration of the Run As options, see the following video. VIDEO: Deployment Run As Options |
|
|
Deploy User |
Executes deployments on target computers in a non-interactive session as the Deploy User. This setting is appropriate for the vast majority of deployments. Consequently, this is the recommended setting. |
Deploy User (Interactive) |
Executes deployments that include both silent and interactive steps. This setting is the same as Deploy User with one important exception—the Windows process running the deployment is run in an interactive session. This setting is most appropriately used for individual deployments that require user input, but the overall process still requires Administrator rights that logged on users may not have. Because these types of deployments are more specialized and because running the deployment in interactive mode requires more processing resources, it is recommended that you apply this setting only as needed at the Package level. IMPORTANT: This feature is available only in Enterprise mode. |
|
Local System |
Executes deployments using the Local System account on the target computer. PDQ Deploy connects to the target computer using the Deploy User credentials, copies the specified files, creates the PDQDeployRunner service, then instructs the service to log on as Local System. This setting is used only for installations that require Local System. These types of deployments are very rare. Consequently, it is recommended that you apply this setting only as needed at the Package level. IMPORTANT: Packages that run as Local System are not able to access network resources. |
|
Logged on User |
Attempts to run packages in interactive mode as the Logged On User of the target machine. This setting is used to deploy applications that are installed per user or when the Logged on User needs to provide information for the deployment to succeed such as a license key. It can also be used to modify the HKEY_CURRENT_USER registry hive for the Logged on User or to access user-specific settings such as %APPDATA% or the Logged on User’s user directory. These types of deployments are highly specialized. Consequently, it is recommended that you apply this setting only as needed at the Package level. IMPORTANT: This feature is available only in Enterprise mode. |
|
Timeout |
Specifies how many minutes the deployment runs before being timed out by the server (requires Enterprise mode to modify this setting). The default value is 60 minutes. This timeout applies only to the duration of a deployment to a target computer. The timeout does not include the initial process of copying installation files to the target. Change the default in Preferences > Deployments options or override the default here. It is best practice to set the shortest timeout interval as the global default in Preferences and increase the timeout interval in individual packages. For example, if you typically deploy small packages such as browser, Java, or Adobe reader updates, you may choose to set the global timeout interval to 20 minutes. You could then increase the timeout interval for individual packages that take longer to install, such as a Windows Service Pack or a package containing many nested packages. |
|
Auto Download |
Select the approval settings used for downloading new versions of the package. The default settings for Auto Download can be modified in Preferences > Auto Download. IMPORTANT: Auto Download settings are only available to an Auto Download package. If the package is Standard, or has been converted to Standard, these options will not be visible. |
|
|
Manual |
New package versions require manual approval before they download. NOTE: Use this option to disable Auto Download without converting to a Standard Package. |
Immediate |
New package versions are immediately approved. |
|
Automatic |
Sets the interval in days and hours after which new versions are automatically approved. This is enabled by default with a setting of 7 days. |
|
Convert to Standard Package |
Use this to convert to a Standard package that will no longer auto download new versions. Once converted all Pre and Post Steps will be converted to regular steps. WARNING: This option cannot be undone. |
|
7.Click the Offline Settings tab and define the settings you want to apply to the current package.
The following table provides information on the Deployment settings available in the Offline Settings tab:
Option |
Description |
|
Offline Status |
Select whether or not target computers will receive a ping or Wake-on-LAN prior to deployment. The default settings for Offline Status can be modified in Preferences > Deployments. |
|
|
Use settings from Preferences |
Uses the global Offline Status settings defined in Preferences. When you select this option, the subsequent settings are disabled. |
Ping before deployment |
Performs a ping (ICMP echo) to all addresses returned by DNS before attempting the deployment on the first to respond. If the target does not respond to the ping within 2 seconds, then the deployment is not attempted on that target. Enabling this option can increase the overall speed of the deployment because PDQ Deploy doesn’t waste time with offline computers. NOTE: Typically, the ping should take only a few milliseconds. However, if your DNS isn’t solid, your network is experiencing latency issues, or your computers have multiple addresses in DNS, then the ping response may take more than 2 seconds. When this is not selected, PDQ Deploy attempts the deployment regardless of the online or offline status of the target computer. If the target is offline or otherwise unavailable, Windows will timeout after ~60 seconds. Leaving this unchecked can decrease the overall speed of the deployment due to these attempts and extra wait time. |
|
Send Wake-on-LAN and attempt deployment |
Attempts the deployment then sends a Wake-on-LAN to offline target computers. The deployment is attempted again if it comes online. After 5 minutes if the computer is still offline, the deployment will be attempted again. The advantage of this feature is that offline computers can immediately be made available for deployment. However, it can increase deployment time. IMPORTANT: This feature is available only in Enterprise mode of both PDQ Deploy and PDQ Inventory. Furthermore, PDQ Inventory must have the MAC address of the target computers’ NICs. |
|
Retry Queue |
Enable or disable the Retry Queue and modify the number of retries for the package. The default settings for Retry Interval, and several other settings for offline computers, can be modified in Preferences > Deployments. Important: Requires Enterprise mode to use Retry Queue settings. |
|
|
Use settings from Preferences |
Uses the global Retry Queue settings defined in Preferences. When you select this option, the subsequent Retry Queue settings are disabled. |
Put Offline Targets in Retry Queue |
Enables the Retry Queue. By default, target computers that are unreachable or offline during a deployment are held in the Retry Queue and deployment is retried. The advantage of this feature is that offline computers are automatically queued for re-deployment. This simplifies the process of ensuring that critical updates are deployed to all target computers. It is recommended that you enable this option per package rather than applying it globally in Preferences. TIP: Some packages with specific, non-critical functions should not use the Retry Queue. For example, it is not advisable to use this option with a package that only reboots target computers because offline computers were probably turned off to begin with and, depending on the target computers’ availability, PDQ Deploy may reboot users’ computers at inopportune times. |
|
Allowed Retries |
Sets the number of retry attempts for an offline computer. This applies per target per deployment. The default setting is 72. To set unlimited retries, set this value to 0. |
|
8.Once the settings are complete, click ![]() Save on the toolbar.
Save on the toolbar.
© 2020 PDQ.com Corporation. All rights reserved.
PDQ.com is a trademark of PDQ.com Corporation. All other product and company names are the property of their respective owners.
Help Version: 19.1.15.0