An PDQ Inventory tool contains the command to be run using the cmd.exe or PowerShell. This section describes how to create and configure tools. (Pro or Enterprise mode is required to create and edit tools). Your own Tools cannot be called against more than one computer at a time.
IMPORTANT: Your own tools are run on the local PDQ Inventory console computer, and not on target computers. This is the opposite of the Remote Command tool. You can run your tools against target computers using variables such as $(Computer:TARGET) but the default behavior of a tool is to run locally.
An alternative to creating a new tool from scratch is to base a new tool on a tool downloaded from the Tools Library. Simply duplicate and rename the tool that is similar to the tool you need, then edit it to meet your requirements. Examining tools is also a great way to learn how tools are configured. For information about duplicating and editing tools, see Duplicating Tools.
This section contains the following:
For more information on creating your own Tools, see the following two webcasts.
Video: Integrating Remote Tools (DameWare, IntelliAdmin) in PDQ Inventory

(https://www.youtube.com/watch?v=Wyn_92fPxNQ)
Video: Integrating Sysinternals (PsTools) with PDQ Inventory
(https://www.youtube.com/watch?v=rUzjFnt8duw)
The Computer Tool Window
Tools are created within the Computer Tool window. To access on the Main Console window click on Tools in the tree. On the Tools page, select the Tools Menu tab and click New > Tool.
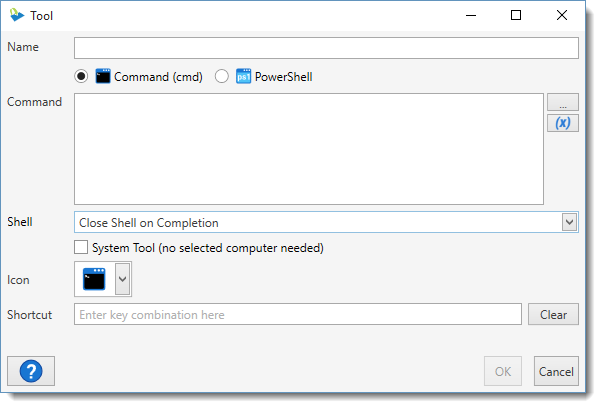
The following table reviews each option in the Computer Tool window.
Item |
Description |
|
Name |
The name of the tool. You are likely to create many tools so it's important to name them clearly and consistently. We suggest using names that include a hint about what is contained in the command. |
|
|
(shell type) |
Choose between Command (cmd) |
Command |
The command of the tool. This is the command that will be run as though run from the Windows command or PowerShell. This can be a command line instruction, a path to an executable, or a script. You can write the path or use the file picker Insert a variable by selecting the variables button Note: The command runs on the local computer, not on the target. This is an important distinction, since a command run through the Tools menu would need to use variables and/or UNC pathnames to be able to perform the command against a target. For example, remotely opening the ADMIN$ share on a target is executed locally with a command, explorer.exe "\\$(Computer:TARGETHOSTNAME)\ADMIN$". |
|
Shell |
The behavior of the Command or PowerShell window after launching the tool. Choose between No Shell, Leave Shell Open, or Close Shell on Completion. |
|
When checked, the tool will run from anywhere within the program without needing a computer to be selected. This is not typically checked if the program will be run on the local PDQ Inventory console (for example, opening up Active Directory Users and Computers). If left unchecked, a computer must be selected for the tool to be available. IMPORTANT: System Tools cannot be used in conjunction with computer specific variables. For information see Computer Variables. |
||
Icon |
The icon used to identify the tool. If no icon is selected, it will default to either the Command or PowerShell icon as chosen for the shell type. |
|
Shortcut |
The keyboard shortcut used to launch the tool. Simply enter the key combination on your keyboard to assign a new shortcut. The shortcut takes the form of Modifier+Key and is created by selecting this field and then pressing the keys in the correct order. The valid modifiers are Shift, Ctrl, and Alt. Shift cannot be used by itself. Examples include: •Ctrl+Alt+Q •Ctrl+Shift+8 •Shift+Alt+B •Alt+F1 IMPORTANT: This shortcut should not conflict with any other in the application or it will not work properly. |
|
Computer Specific Variables
You can use variables with tools. The Command Line field of the Custom Computer Tool window will accept environmental variables (for example, %PROGRAMFILES%, %WINDIR%, %SYSTEMDRIVE%, etc.), as well as variables defined within PDQ Inventory (variables are not case sensitive). The computer specific variables available within PDQ Inventory are as follows:
IMPORTANT: Computer specific variables starting with %TARGET are no longer supported and will need to be replaced with a computer variable starting with $(Computer:TARGET. Additionally, computer specific variables cannot be used when the System Tool is checked. For more information, see System Tool.
Computer Specific Variable |
Description |
$(Computer:TARGET) |
The name of the computer. |
$(Computer:TARGETHOSTNAME) |
The full domain name of the computer. |
$(Computer:TARGETIPADDRESS) |
The IP address of the computer. |
$(Computer:TARGETMACADDRESS) |
The MAC address of the computer. |
$(Computer:TARGETOSNAME) |
The name of the computer's operating system |
$(Computer:TARGETSERIALNUMBER) |
The serial number of the computer, if available. |
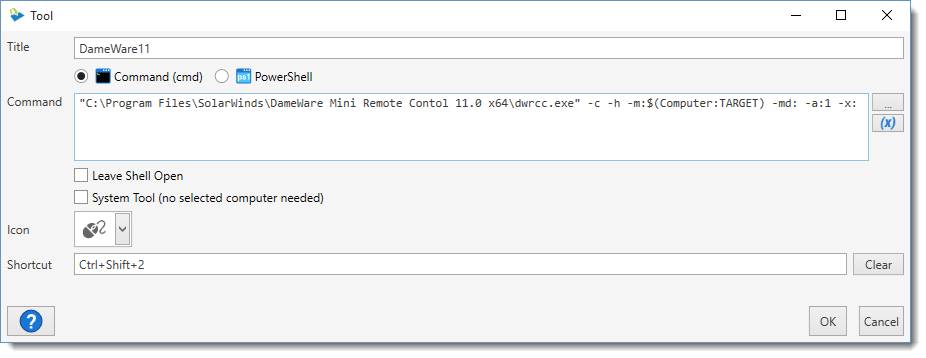
The example below shows a Tool which opens a DameWare 11 remote control session against a selected computer, using the Command "C:\Program Files\SolarWinds\DameWare Mini Remote Control 11.0 x64\dwrcc.exe" -c -h -m:$(Computer:TARGET) -md: -a:1 -x:
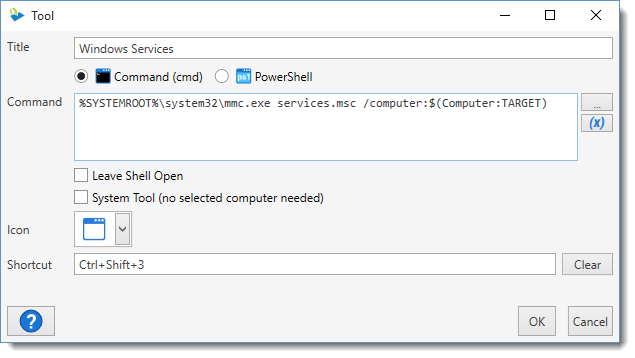
The example below shows a Tool which opens MMC and loads the Services.msc snap-in and connects to the selected computer, using the Command %SYSTEMROOT%\system32\mmc.exe services.msc /computer:$(Computer:TARGET)
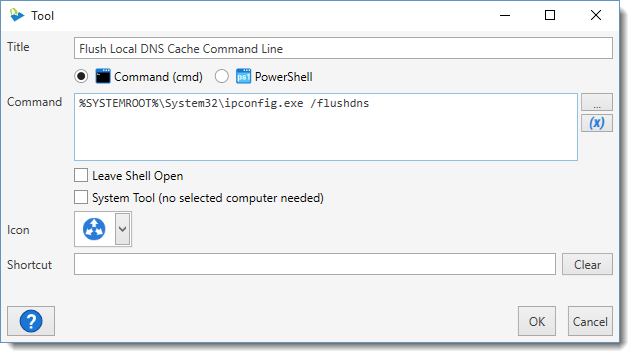
The example below shows a Tool which flushes your DNS cache in Windows, using the Command %SYSTEMROOT%\System32\ipconfig.exe /flushdns
© 2016 Admin Arsenal, Inc. All rights reserved.
Admin Arsenal is a trademark of Admin Arsenal, Inc. All other product and company names are the property of their respective owners.
Help Version: 11.2.0.0