In PDQ Inventory you can create custom reports to access specific information about the computers in the PDQ Inventory database. Enterprise mode is required to save changes to reports or create a new report from a collection.
Basic Reports are created and edited in the Report window, using the Define Report button. This window contains the report details, the Columns, Filters, and Auto Reports tabs where you specify basic report details, add the data you want in your report, set filtering options, and determine whether your reports are automatically run on a schedule (Enterprise mode required for Auto Reports). You can also manage aspects of reports on the main console. For information about managing and editing reports, see Managing Reports.
You can run reports and view report data in the Report window, using the Run Report button. To see how reports will look when output, view the report in the Print Preview window. For details, see Running Reports and Print Preview Window.
Creating a Basic Report
This procedure includes the following parts:
•Part 1: Adding Basic Report Details
•Part 2: Configuring Report Columns
•Part 3: Configuring Report Filters
•Part 4: Managing Auto Reports
•Part 5: Finishing and Testing the Report
Part 1: Adding Basic Report Details
To create a new basic report:
1.On the main console window, do one of the following:
•On the toolbar click New Report > Basic.
•Click Report > New Report > Basic.
•On the tree select the Reports folder, then right-click and select New Reports > Basic.
A new Report window opens with the Define Report button selected.
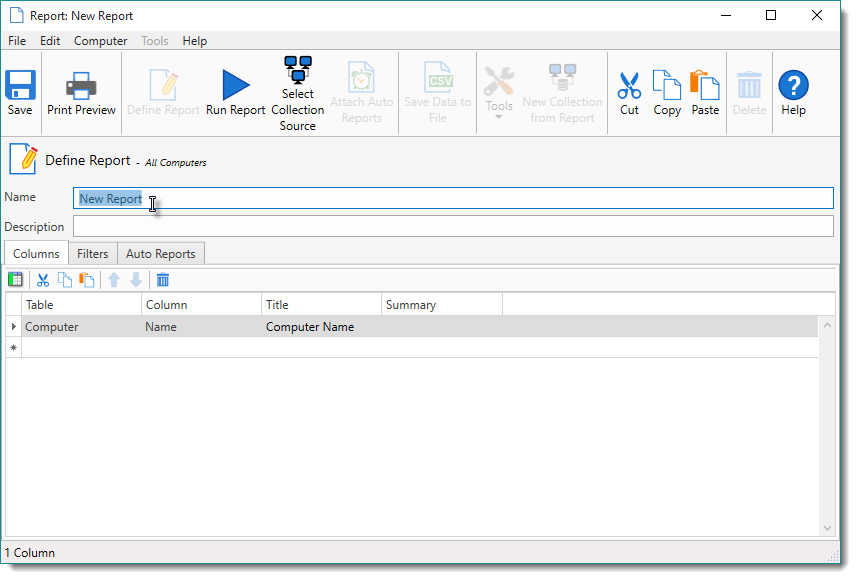
2.Type a name for the report.
Use a name that explains the purpose of the report.
3.(Optional) Include a description for the report.
Like the name, it’s important to provide a description that clearly explains the purpose of the report. For additional guidance, look at the descriptions of the prebuilt reports.
4.Click Save ![]() (or press Ctrl+S).
(or press Ctrl+S).
As you progress through the report configuration process, you should periodically save changes. You can also close (and save) the report window to continue later.
The new report is added to Reports on the main console tree. You can create custom report folders and move reports around. For details, see Custom Report Folders.
5.Continue to Part 2: Configuring Report Columns to configure the columns (data included) for the report.
Part 2: Configuring Report Columns
The Columns configuration determines the content, or data, your report contains.
To configure the report columns:
1.Click the Columns tab.
2.To configure a report column, do the following:
a.Click the Table list and select a table.
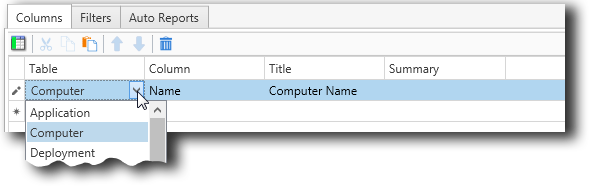
The table represents the data category you select the report column from.
b.Click the Column list and select a data column.
The column represents the specific data type from the table to be used for the report column.
c.(Optional) Edit the Title field.
The title is the name of the column in the report. PDQ Inventory includes a default name based on the selected column, but you can change it.
d.(Optional) Click the Summary field and select a value.
Each column can be displayed as a summary, which results in a single value that summarizes the data relative to the other non-summary columns in the report. Not all summaries are available for all data types.
Choose a summary from the following options:.
Summary |
Column type |
Description |
Count |
All |
A count of the unique values within the column. |
Sum |
Number |
|
First |
Text, Date/Time |
The first item alphabetically (for text) or chronologically (date/time). |
Last |
Test, Date/Time |
The last item alphabetically (for text) or chronologically (date/time). |
Average |
Number |
|
Minimum |
Number |
The smallest value. |
Maximum |
Number |
The largest value. |
e.(Conditional) Do one of the following:
•To add an another column, go to step 2.
Obviously, most reports contain more than one column. Add as many columns as you need.
•To continue configuring other aspects of the report, continue to step 3.
3.(Optional) To add a column, do the following:
a.On the toolbar, click Add Column ![]() .
.
The new column appears in the list.
b.(Conditional) Click the Move Up![]() or Move Down
or Move Down![]() arrows to change the position of the column (left to right) in the report.
arrows to change the position of the column (left to right) in the report.
c.Return to step 1 to configure the new column.
4.Click Save ![]() (or press Ctrl+S).
(or press Ctrl+S).
As you progress through the report configuration process, you should periodically save changes. You can also close (and save) the report window, then continue later.
5.Continue to Part 3: Configuring Report Columns to configure the report filters.
Part 3: Configuring Report Filters
This part of the procedure contains links throughout to relevant content in the Filter Editor section.
NOTE: By default a new report includes a top level group filter that cannot be deleted. If you create a report from a dynamic collection, the new report will contain the filter configuration from the collection. For more information, see Creating Reports from Collections.
To configure the report filters:
1.Click the Filters tab.
2.To set the top group filter ![]() rule, click the Group Filter list and select a rule.
rule, click the Group Filter list and select a rule.
Choose a rule from the following options:
Rule |
Description |
All |
Items will only be included if all filters in the group (including any/all nested groups) are true. This is similar to using the AND operator in SQL. |
Any |
Items will only be included if any one (or more) of the filters in the group are true (including any nested groups). This is similar to using the OR operator in SQL. |
Not All |
Items will only be included if any one (or more) of the filters in the group are false (includes any nested groups). |
Not Any |
Items will only be included if all filters in the group (including any/all nested groups) are false. |
3.(Optional) To add additional group filters, do the following:
a.On the toolbar, click Add Group Filter ![]() .
.
The new group filter appears below the last item in the list.
b.(Conditional) Click the Move Up![]() or Move Down
or Move Down![]() arrows to change the position and nesting of the group filter.
arrows to change the position and nesting of the group filter.
For details, see Arranging Group and Value Filters.
c.Click the Group Filter list and select a rule.
4.(Optional) To add value filters, do the following:
a.On the toolbar, click Add Value Filter ![]() .
.
The new filter appears in the list.
a.(Conditional) Click the Move Up![]() or Move Down
or Move Down![]() arrows to change the position and nesting of the filter.
arrows to change the position and nesting of the filter.
For details, see Arranging Group and Value Filters.
5.To configure a value filter ![]() , do the following:
, do the following:
a.Click the Filter list and select a filter.
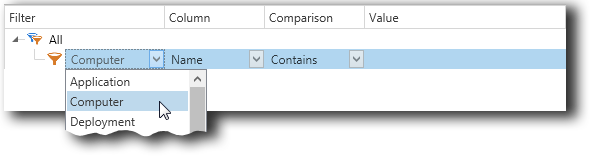
The filter represents the data category the report filters against. For details, see Filter.
a.Click the Column list and select a data column.
The column represents the property of a computer to compare against the value. For details, see Column.
a.Click the Comparison list and select a comparison.
The comparison is how the column is compared to the value. For details, see Comparison.
a.(Conditional) Click the Value field or list and enter or select a value to compare the column against.
The value type depends on the comparison selected. For details, see Value.
6.(Conditional) Do one of the following:
•To add an additional group filter, go to step 3.
•To add an additional value filter, go to step 4.
•To continue configuring other aspects of the report, continue to step 7.
7.Click Save ![]() (or press Ctrl+S).
(or press Ctrl+S).
As you progress through the report configuration process, you should periodically save changes. You can also close (and save) the report window, then continue later.
8.If you are finished configuring the report filters, do one of the following:
•If you want your new report to run automatically on a schedule, continue to Part 4: Managing Auto Reports.
•If you don't want to schedule your report now, continue to Part 5: Finishing and Testing the Report.
Part 4: Managing Auto Reports
This part of the procedure is optional. You can associate reports to auto reports and PDQ Inventory will automatically generate your report on the schedule defined in the auto report. Enterprise mode is required to create and use Auto Reports.
NOTE: You must save a new report before attaching auto reports.
To attach auto reports:
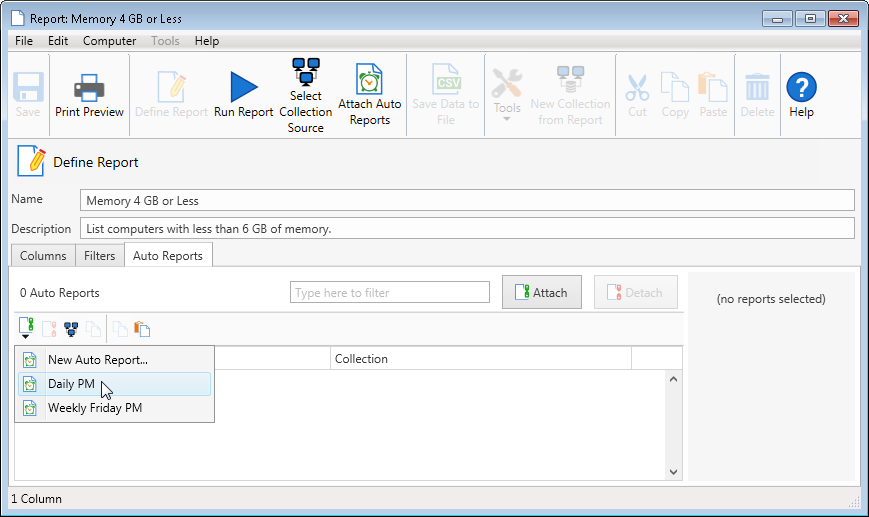
1.Click the Auto Reports tab and do one of the following:
•On the Auto Reports toolbar, click Attach to Auto Report ![]() .
.
•Click the Attach ![]() button.
button.
Select an existing auto report, or to create a new one, click New Auto Report.
•(Conditional) If you already have auto reports in your system, on the Report window toolbar, click Attach Auto Reports ![]() , select an auto report, then click OK.
, select an auto report, then click OK.
Auto reports you select will be added to the list.
For details about creating new auto reports, see Creating Auto Reports.
2.(Optional) To remove an auto report, select it, then click Detach from Auto Reports ![]() .
.
3.(Optional) To change the collection an auto report runs against, select an auto report, click Change Collection ![]() , select a new collection, then click OK.
, select a new collection, then click OK.
4.Click Save ![]() (or press Ctrl+S).
(or press Ctrl+S).
As you progress through the report configuration process, you should periodically save changes. You can also close (and save) the report window, then continue later.
5.If you are finished managing auto reports, continue to Part 5: Finishing and Testing the Report.
Part 5: Finishing and Testing the Report
This part of the procedure helps you test and wrap-up the configuration of your new report.
To test and finalize your new report:
1.To test the results of your report configuration, on the Report window toolbar, click Run ![]() .
.
This switches the Report from Define Report to Run Report and populates the lower part of the window with report data.
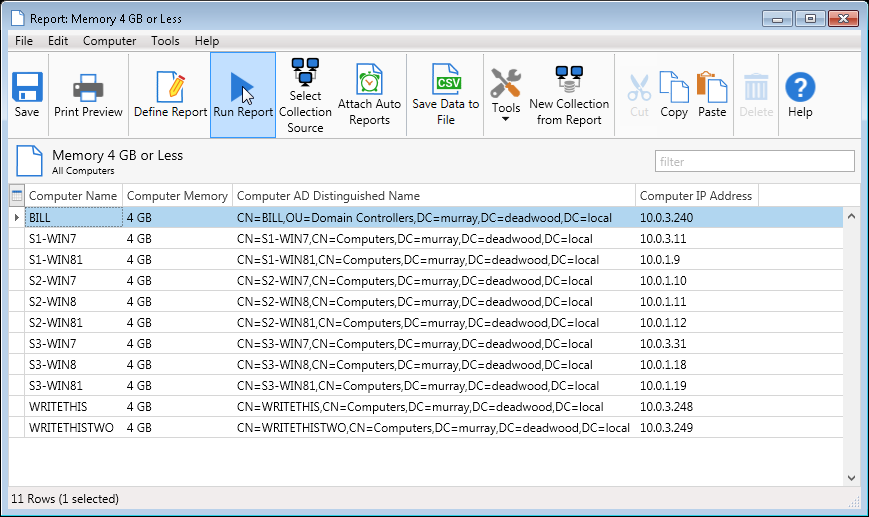
View the results of the report. You can also click Print Preview ![]() to see what your report looks like when it is formatted and printed. For detailed information about printing, see Print Preview Window.
to see what your report looks like when it is formatted and printed. For detailed information about printing, see Print Preview Window.
NOTE: If you don't get the results you expect, click Define Report ![]() . Return to the Columns or Filters tabs to check your configurations, then run the report again. Repeat as needed.
. Return to the Columns or Filters tabs to check your configurations, then run the report again. Repeat as needed.
2.(Optional) To change the collection the report runs against, click Select Collection Source ![]() , select a different collection, then click OK.
, select a different collection, then click OK.
3.When you are finished configuring your report, click Save ![]() (or press Ctrl+S), then close the window.
(or press Ctrl+S), then close the window.
For information about managing and editing reports, see Managing Reports.
© 2018 PDQ.com Corporation. All rights reserved.
PDQ.com is a trademark of PDQ.com Corporation. All other product and company names are the property of their respective owners.
Help Version: 17.0.4.0