PDQ Inventory tools are viewed on the Tools Menu tab of the Tools page. Tools are modified in the Tool window. Tools can also be duplicated, exported and imported, and organized exactly as desired for the Main Console's Tools menu.
This section describes how to manage tools and includes the following topics:
•Exporting and Importing Tools
Organizing Tools
Tools are organized on the Tools Menu tab of the Tools page on the Main Console. To access, click on Tools in the Main Console tree and select the Tools Menu tab. This page lists all of the Tools that come with PDQ Inventory, are imported from the Tools Library, or are created by the user and can be used in the Tools menu. (Enterprise mode is required to edit Tools).
The Tools Menu tab provides a view of how the tools will be displayed in the Tools menu of the Main Console. Tools are created, organized, and deleted from this tab.
IMPORTANT: Tools are not launched from this page, this page is used for creating, editing, and organizing. For more information regarding launching a tool, see Launching a Tool.

The following table reviews each component of the Tools Menu
Options |
Description |
|
|---|---|---|
Tools grid |
This grid displays all Tools that have been imported and configured. |
|
|
Name |
The name of the tool as it will appear in the Tools menu. Note: You can create hotkeys in this section by including an underscore followed by the desired letter. For example _Ping -t will create the P hotkey. Using two underscores will cancel the hotkey creation and display one underscore in the name. |
Shortcut |
The keyboard shortcut assigned to use for the tool. This shortcut needs to be unique to the application and not currently in use or it will not work properly. |
|
Required Software |
The name of any additional software required on the console machine in order for the tool to launch and run properly. This information is populated from the Tools Library. |
|
System Tool (hidden by default) |
The indication that the tool will run from anywhere within the program without needing a computer to be selected. The tool will still receive the above environment variables when a computer is selected. To add this column, click Customize this grid |
|
Edit |
Opens the Tool window for the selected tool. Depending on the type of tool, this window may only include the ability to edit the Name, Icon, and Shortcut. For more information, see Editing a Tool. |
|
New |
|
|
|
Tool |
Opens a blank Tool window. For more information on creating a new tool, see Tool window. |
Folder |
Creates a folder for the Tools menu on the main console. |
|
Separator Line |
Creates a separator line that will be visible in the Tools menu on the main console. |
|
Delete |
Deletes the selected tool. Confirm the deletion by clicking OK. |
|
Duplicating Tools
You can streamline the creation of a new tool by duplicating, renaming, and editing a tool that is similar to the tool you need. Examining and repurposing tools is also a great way to learn how tools are configured.
To duplicate a tool:
1.Select the tool you want to duplicate on the Tools Menu tab of the Tools page.
2.Right-click the tool and select Duplicate (or press Alt+Insert).
A duplicate tool appears in the grid with a number appended to its name. You can also copy and paste a tool to create a duplicate.
3.(Optional) To rename a tool, click Edit (or press Ctrl+O), edit the name, then click OK.
It’s good practice to rename the tool so it matches its new purpose and to avoid confusion when using the original tool.
4.To edit the selected tool, double-click it, click Edit (or press Ctrl+O), make your changes, then click OK.
It’s good practice to rename the tool so it matches its new purpose and to avoid confusion when using the original tool. For information about changing tools, see Editing Tools below.
Exporting and Importing Tools
Tools can be exported to an XML file and then imported into PDQ Inventory on another computer.
To export tools:
1.Select one or more tools or a folder of tools.
When exporting a folder, all of the tools and folders within it are also exported.
2.Click File > Export (or press Ctrl+E or right-click and select Export).
3.Browse to where you want to save the tool(s), then click Save.
IMPORTANT: Only the tools definitions are exported, not any files used by the tool. When importing the tool on another computer, copy any applicable files to the second computer.
To import tools:
1.To determine where the imported tool(s) are placed on the Tools Menu page, do one of the following:
•To import at the top level of the Tools Menu, click the empty part of the page.
•To import into a folder, select the folder or an item in the folder.
2.Click File > Import (or press Ctrl+I or right-click and select Import).
3.Browse to and select the tool(s), then click Open.
Editing Tools
Tools are edited in one of two tool windows. You may need to edit one of your tools, for example, if there is a conflicting shortcut key. You can also duplicate existing tools to use as templates.
To edit a tool:
1.Locate and select the tool you want to edit in the Tools Menu on the Tools page of the Main Console Tree.
2.Double-click the tool or click Edit. One of two types of Tool windows opens.
The Tool window is used for default tools that only has a subset of changes.
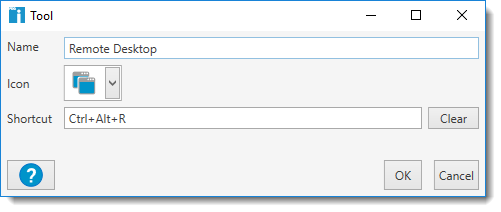
For custom tools, the window is the name of the tool in Edit Mode.
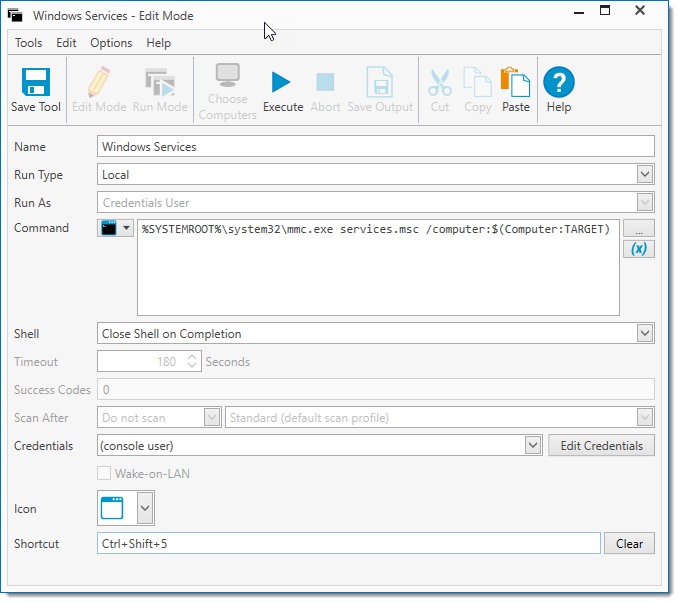
3.To modify the tool, see the Tool window for a table of all the different items and their descriptions.
4.When you have finished editing, click OK.
© 2022 PDQ.com Corporation. All rights reserved.
PDQ.com is a trademark of PDQ.com Corporation. All other product and company names are the property of their respective owners.
Help Version: 19.3.254.0