PDQ Inventory Overview: Components and Functions
This chapter introduces some of the main components/functions of PDQ Inventory—the Main Console Window, Adding Computers, Collections, the Computer window, Reports, and Tools.
This section includes the following topics:
•Managing Inventory from the Main Console Window
•Grouping Computers in Collections
For a look at an introduction, see the following video.
VIDEO: Introduction to PDQ Inventory

Intro to PDQ Inventory
(https://youtu.be/VLclDr-qe8c)
Managing Inventory from the Main Console Window
The PDQ Inventory main console window is where you manage the inventory of data gathered from the computers on your network. The main console is comprised of the following components—the Menu and Toolbar, the Tree, the Page window, and the Status bar.
The main console window provides access to the following:
Options |
Description |
All Computers page |
List of all the computers in your inventory database. |
Auto Reports |
List of your custom Auto Reports (Enterprise mode required). |
Collection Library |
Sets of up-to-date collections maintained by PDQ for many popular applications and runtimes (Enterprise mode required). |
Reports (Default Folder) |
Folder containing prebuilt and custom reports (Enterprise mode required to create and save custom reports). |
Active Directory Collections |
Collections based on your Active Directory layout. PDQ Inventory creates these collections when at least one AD computer is added and scanned. |
Default and Custom Collections |
Dynamic (default and custom) collections and static collections. |
For details, see Main Console Window.
Adding Computers to the Database
To get started using PDQ Inventory, you must add your computers to the database so they can be scanned and analyzed.
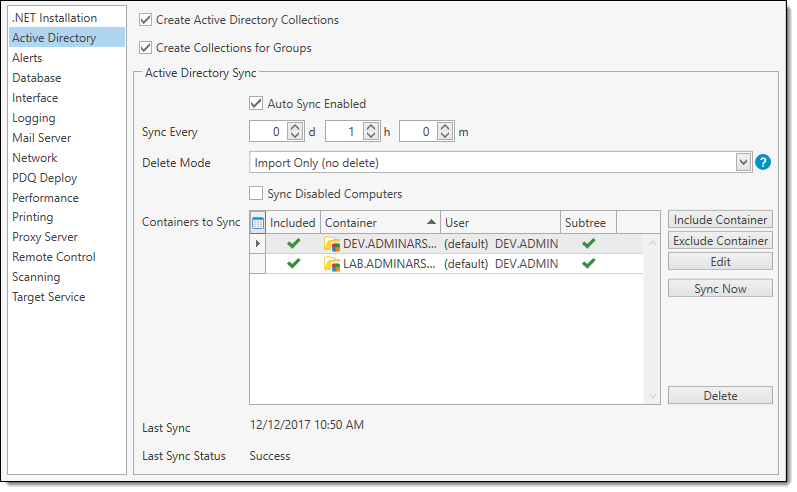
In Enterprise mode, you can add Active Directory computers automatically. In Preferences > Active Directory, click Auto Sync Enabled, select the AD Containers to include, then click Sync Now. Active Directory Sync is the preferred method for adding computers with AD because it can be configured to automatically sync them on a schedule to capture future changes made in AD. It can even add new computers to your PDQ Inventory database and AD collections when they are added to Active Directory. For details, see Active Directory Collections and Active Directory in Preferences. (Enterprise mode required to use Active Directory Sync.)
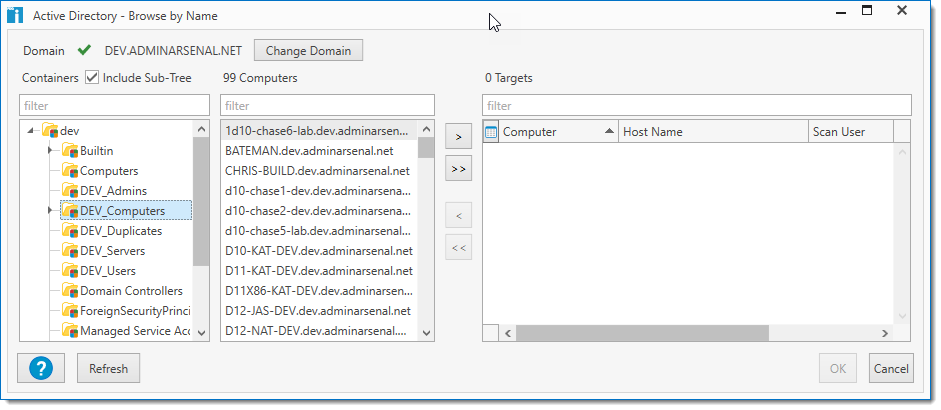
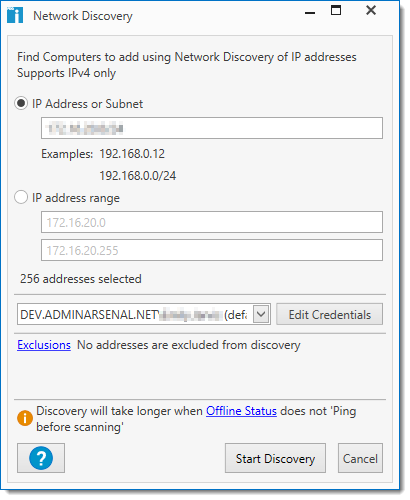
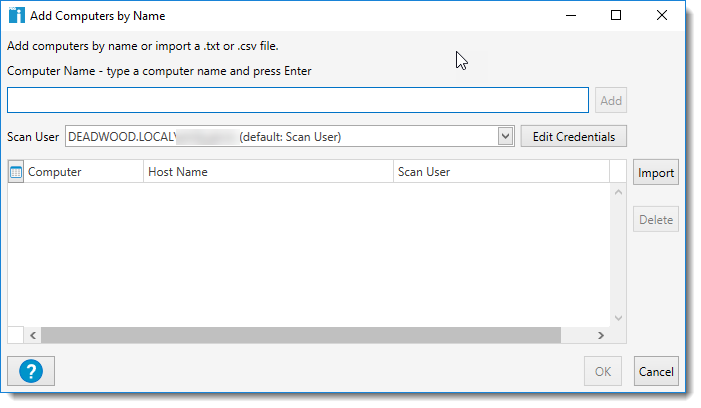
Computers can also be added by browsing Active Directory, with Network Discovery, or even by Name. To open the other options, click Add Computers on the main console toolbar and choose from the Active Directory - Browse by Name, Network Discovery, or By Name (or click Computer > Add Computers). (Enterprise mode required to use Network Discovery.)
Once your computer names are added to the database (populating the All Computers collection), they are immediately scanned for their hardware, software, and Windows configuration information. PDQ Inventory uses this data to automatically populate the prebuilt collections.
Grouping Computers in Collections
PDQ Inventory uses collections to make it easier to manage the computers on your network. A collection represents a set of computers with specific hardware, software, or Windows configuration data. Collections can be populated dynamically by scanning and filtering computers for configuration data (dynamic collections) or manually by adding/removing computers (static collections). Collections can be nested below other collections in the tree. These subcollections retain independent filters, unless the Drill down from parent collection option is selected (dynamic collections only). A drill down collection becomes dependent upon the parent collection by evaluating only the members contained in the parent collection. A drill down collection will not evaluate from all computers in the database. For details about using and creating collections, see Grouping Computers.
To view PDQ Inventory collections, on the Main Console window tree, select a collection. The computers in the selected collection appear on the Collection page.
The following table describes the four types of PDQ Inventory collections:
Collection Type |
Icons |
Description |
All Computers |
|
An automatic collection that contains all the computers added to your local database through Active Directory, with Network Discovery, or by Name. |
Dynamic |
|
Collections containing computers that match a set of collection filters. Computers in these collections are dynamically updated as inventory or filters change. Prebuilt collections: Dynamic collections built into PDQ Inventory. For example: •Internet Explorer: Shows all computers with Internet Explorer installed and contains subcollections for several versions of Internet Explorer. •Memory: Shows the memory configuration of all computers and contains subcollections for ranges of installed memory (for example, 5 to 8 GB). Drill down from parent collection: Dynamic subcollections that evaluate only the computers contained in the parent collection. Collection Library: Dynamic collections that filter computers based on popular applications and runtimes such as Java, Adobe Flash, and Google Chrome (Enterprise mode required). These collections are constantly updated and maintained by PDQ. |
Static |
|
Collections populated manually by adding or removing computers. |
Active Directory |
|
Collections automatically created after at least one Active Directory computer is added and scanned. NOTE: These collections are not created by the use of Active Directory Sync. (Enterprise mode required for Active Directory Sync.) Active Directory Organizational Units (OUs): Collections populated by members of your AD OUs. Only OUs that contain computer objects (either directly, via child OUs, or Security Groups that contain computer objects) will display in PDQ Inventory. Active Directory Security Groups: Collections populated by members of your AD Security Groups (Enterprise Mode required). Only Security Groups that contain computer objects (either directly or via inheritance) will display in PDQ Inventory. |
Custom Collections
You can also create your own custom dynamic and static collections. Dynamic collections are automatically populated and updated by computers that match a set of collection filters you configure. Static collections are manually populated by adding or removing members.
•To create a new dynamic collection, click New Dynamic Collection on the main console toolbar (or click Collection > New Dynamic Collection or press Ctrl+N).
•To create a new static collection, click New Static Collection on the main console toolbar (or click Collection > New Static Collection or press Ctrl+Shift+N).
Using the Computer Window
The Computer window is a very powerful resource that provides access to all the inventory data for a single computer. From the Computer window you can also start a scan, run a remote command, initiate a remote control session, launch PDQ Deploy and other admin tools, or print Computer window pages specific to a computer.
To open the Computer window, double-click any computer on any collection page (or select a computer, then click Computer > View Computer Details or press Ctrl+O).
The Computer window is comprised of the following components—the Menu and Toolbar, the Tree, the Page, and the Status bar.
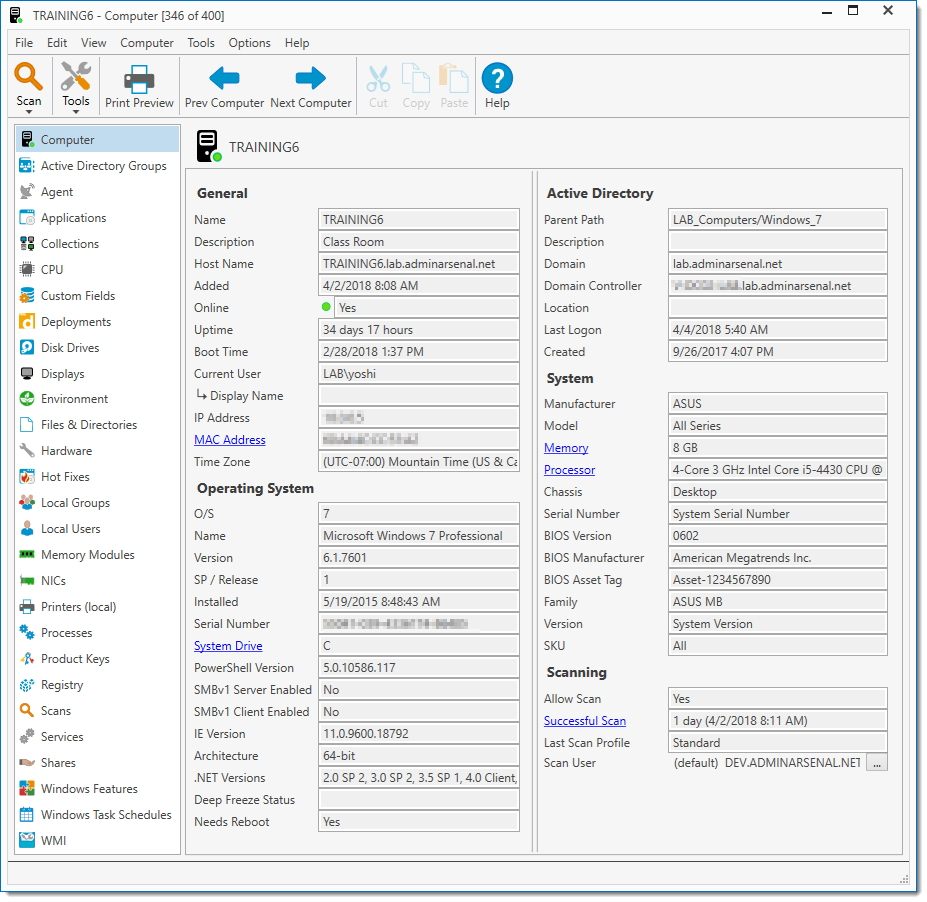
Each component of the computer's inventory is included in the list on the left of the Computer window. Select an element in the list and view the details on the Inventory page on the right. For all the details about the Computer window and its contents, see Computer Window.
Creating Reports
PDQ Inventory provides robust reporting tools that allow you to access your computer inventory data using the reports built in to PDQ Inventory. You can also customize the prebuilt reports and create new reports. You can run the prebuilt reports and create new reports in Free mode, but Enterprise mode is required to save changes.
You can run reports against all computers in the system or a particular collection, making it easier to include the exact data you want. For details, see Running Reports.
Reports can be viewed on screen, printed, and exported in a variety of formats. To save a report, click Print Preview (or click File > Print Preview or press Ctrl+P), then click Export Document. For details, see Print Preview Window.
You can also create Dynamic Collections from your reports (Basic not SQL). In the Report window, click the New Collection from Report button. A new collection using the same filters as the report will be created and added to the main console tree.
Auto reports allow you to set up, run, and email inventory reports on defined schedules (Enterprise mode required). For details, see Creating Auto Reports.
Report Types
You can use our built-in report designer to create custom PDQ Inventory basic or SQL reports. On the main console toolbar, click New Report (or click Report > New Report), then select the report type. The table below explains the new report options.
Type |
Description |
Basic |
Creates a new basic PDQ Inventory report built using our easy report designer. |
From Collection |
Creates a new basic report using the selected collection data. |
SQL |
Creates any type of report using standard SQL (PDQ Inventory uses a SQLite database). |
For detailed information about creating reports, see Designing Custom Reports.
Additional Tools
PDQ Inventory tools allow you to run prebuilt and external (non-PDQ) admin tools remotely against individual computers or groups of computers.
To access these tools, click Tools on the toolbar (or click the Tools menu) and select the appropriate tool. For details about tools, see Working with Tools.
The following table lists the prebuilt admin tools available in PDQ Inventory:
Item |
Icon |
Description |
Event Viewer |
|
Opens the event log on the target computer. |
Manage with MMC |
|
Opens the computer's Microsoft Management Console. |
PDQ Deploy |
|
Opens PDQ Deploy and initiates a deployment. You can choose target computers in PDQ Inventory by selecting a collection or in PDQ Deploy on the PDQ Deploy or Schedule windows. |
Reboot/Shutdown |
|
Opens the Reboot/Shutdown window. |
Remote Assist |
|
Opens the Windows Remote Assistance window. |
Run Command |
|
Opens the Run Command window. |
Remote Desktop |
|
Opens the Windows Remote Desktop window. |
VNC |
|
Opens the VNC remote control viewer. |
Wake |
|
Opens the Wake-on-LAN window. |
Open ADMIN$ Share |
|
Opens the ADMIN$ share on the remote computer. Many remote administration tools need to read or write to the Admin$ share. |
Additional Tools
You can also add additional admin tools to PDQ Inventory using the Tools Library (Enterprise mode required), or creating your own tools (Enterprise mode required.) To import tools from the Tools Library, click on Tools in the Main Console tree and select the Tools Library tab, you can import tools from this page. For more information, see The Tools Library. To add or edit tools using the Tool window, click on Tools in the Main Console tree and select the Tools Menu, then click New or Edit. For details, see Creating a New Tool.
© 2018 PDQ.com Corporation. All rights reserved.
PDQ.com is a trademark of PDQ.com Corporation. All other product and company names are the property of their respective owners.
Help Version: 16.5.0.0